How to make a paper envelope like a gifting guru
We often buy gift vouchers, money, jewellery and small items to give as gifts but we don't know how to present them well. Here's the solution: this a handmade envelope will create a beautiful bespoke pouch for your flat-shaped gift, so that you'll be gift-wrapping small presents like a gifting guru in no time.
In this step-by-step tutorial, award-winning gift wrapper Jane Means will show you how to present your odd-shaped gifts in style with this versatile paper envelope. Thick paper works well for this, and it is a great way to use up remnants of paper too.

What you need in order to create your gifting paper envelope:
- Thick paper i.e. wallpaper
- Scissors
- Double-sided tape
- Ribbon
- Decoration or tag

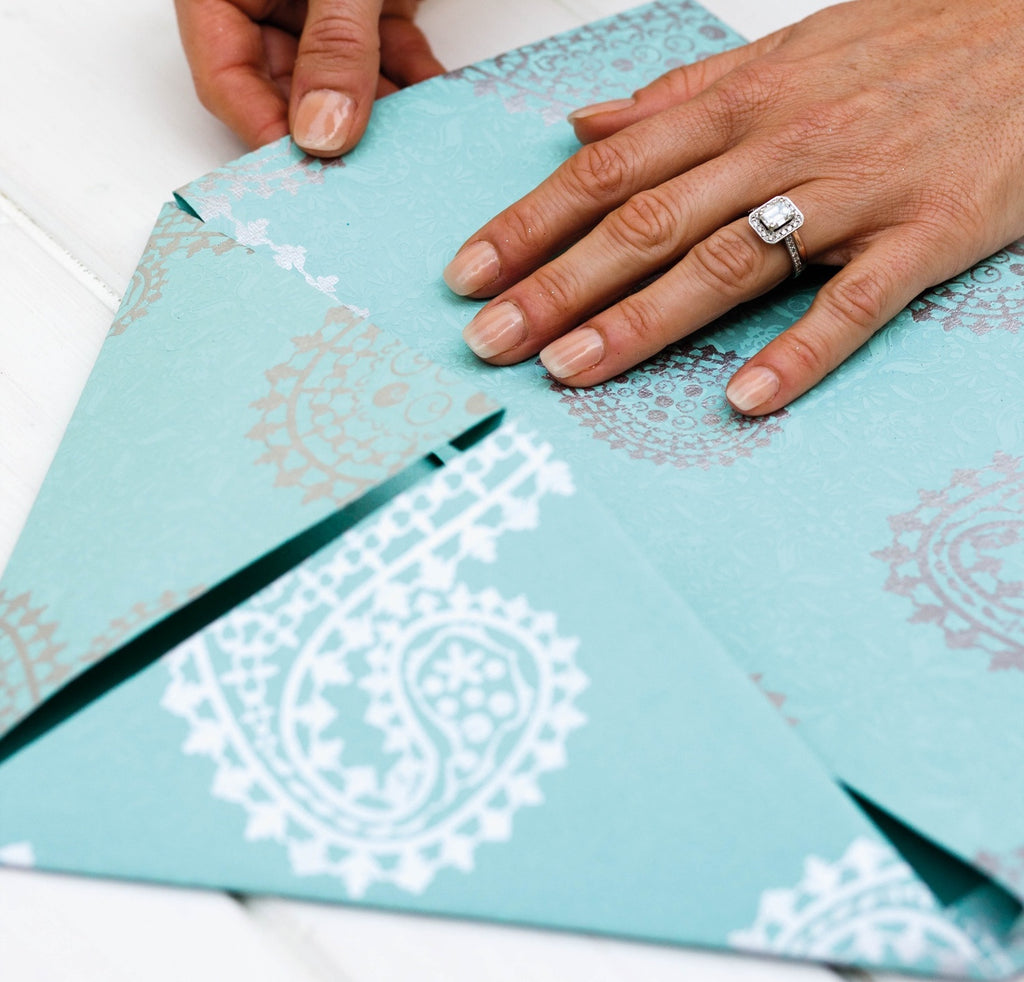
Step 1: Cut and fold paper
Cut your paper into a square or oblong (portrait), depending on the size of your object, and place pattern-side down on a flat surface. Fold in the two vertical sides by approximately 1cm/½in, making sure they are straight, so the width of the paper is the same.

Step 2: Fold corners
Fold in the top two corners to make a central point. This will become the envelope flap.

Step 3: Fold bottom edge
Next, fold in the bottom edge to form the envelope pocket.
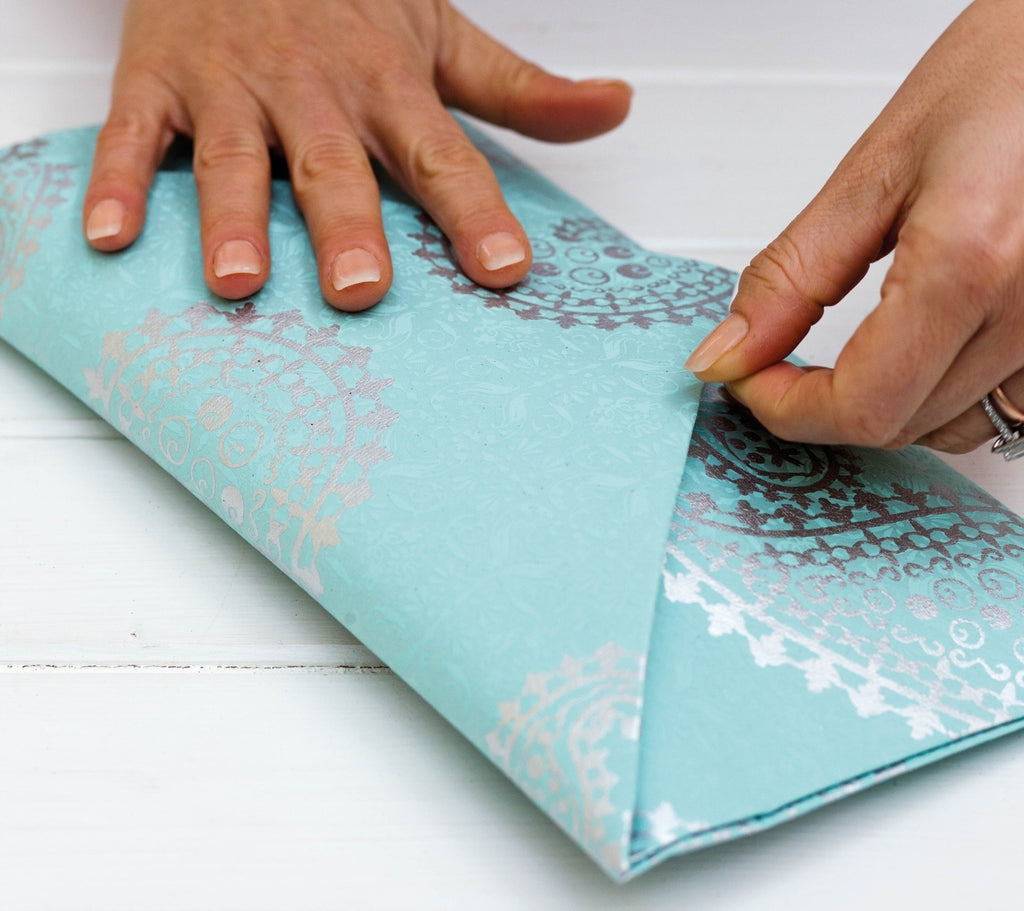
Step 4: Fold and add tape
Fold the paper out flat again and add double-sided tape to the inner folds of the two vertical sides.

Step 5: Fold bottom edge again
Fold the bottom edge in again to form the pocket shape, and stick in place.

Step 6: Place gift inside
Place the gift inside the pocket, then seal the central point of the top two corners with double-sided tape to form the flap.

Step 7: Add more tape and ribbon

Your completed paper gift envelope
Congratulations! You've now completed your paper gift envelope, and it looks fantastic. For more gift wrapping ideas, pick up a copy of Jane Means' book Giftwrapped to master present-giving for all occasions.
Now that you have the perfect wrapping technique, it's time to make some more and fill them with beautiful homemade gifts. Pick up a leather fob kit from Carréducker and create 6 stunning fobs with your own two hands, then slide each one into your gift envelope for a personalised present that will wow giftees.
For more creative holiday ideas, see our creative Christmas projects to keep hands busy and add a little festive magic to your home.