Make a festive crochet robin in this free project
Robins mark the holiday season as sure as the first frost. Crochet your very own festive feathery friend, complete with glass eyes, legs and eggs, to add to your Christmas decor this year.
Taken from Vanessa Mooncie's Crocheted Birds: A Flock of Feathered Friends to Make, this project is ideal for those with some knowledge of crocheting. Not confident in your skills to undertake this project? Not to worry. Expert textile artist Heather Orr offers a fantastic course on crocheting along with a kit filled to the brim with tools and materials to try out. Get her Learn to Crochet Masterclass and you'll be crocheting in no time.

Materials you'll need to crochet your festive robin:
- Drops Alpaca 4ply, 100% alpaca (183yd/167m per 50g ball), or any 4ply yarn:
- 1 x 50g ball in 0607 Light Brown Mix (A)
- 1 x 50g ball in 2925 Rust Mix (B)
- 1 x 50g ball in 0501 Light Grey Mix (C)
- 1 x 50g ball in 1101 White (D)
- 1.25mm (UK3:US8), 1.75mm (UK2:US6) and 2.25mm (UK13:USB/1) crochet hooks
- Blunt-ended yarn needle
- Toy stuffing
- 17in (43cm) length of 18-gauge (1mm) craft wire for the legs
- 7in (18cm) length of 26-gauge (0.4mm) craft wire for the tail
- 4in (10cm) length of 26-gauge (0.4mm) craft wire for the beak
- 1 pair of 3⁄16in (5mm) looped glass teddy bear eyes or buttons
- Strong sewing thread
- Sewing needle
- Long-nose pliers
- All-purpose adhesive glue
Crocheting the robin: an overview
The robin’s head is worked in continuous rounds of double crochet with the shaping of the breast worked in rows. An opening is created at the base of the body to insert the legs. The tail and wings are crocheted in rows and the last row of the tail is crocheted around craft wire to hold its shape so it can stand upright. The narrow beak is worked in rows. The first row is crocheted around craft wire as the beak is too small to stuff. The edges of the beak are sewn together before stitching it to the head. The legs are made of craft wire wrapped in yarn and bent into shape. The robin’s eggs are worked in rounds and stuffed. The speckles are embroidered on the surface after stuffing.
N.B. Some of the colour changes on the chart won’t correspond with the stitches of the previous round. This is because the stitches travel diagonally up the work when crocheting in continuous rounds, so to keep the markings of the robin straight, the colour change is occasionally made on a different stitch.
Tension / guage: 32 sts and 36 rows to 4in (10cm) over double crochet using 2.25mm hook
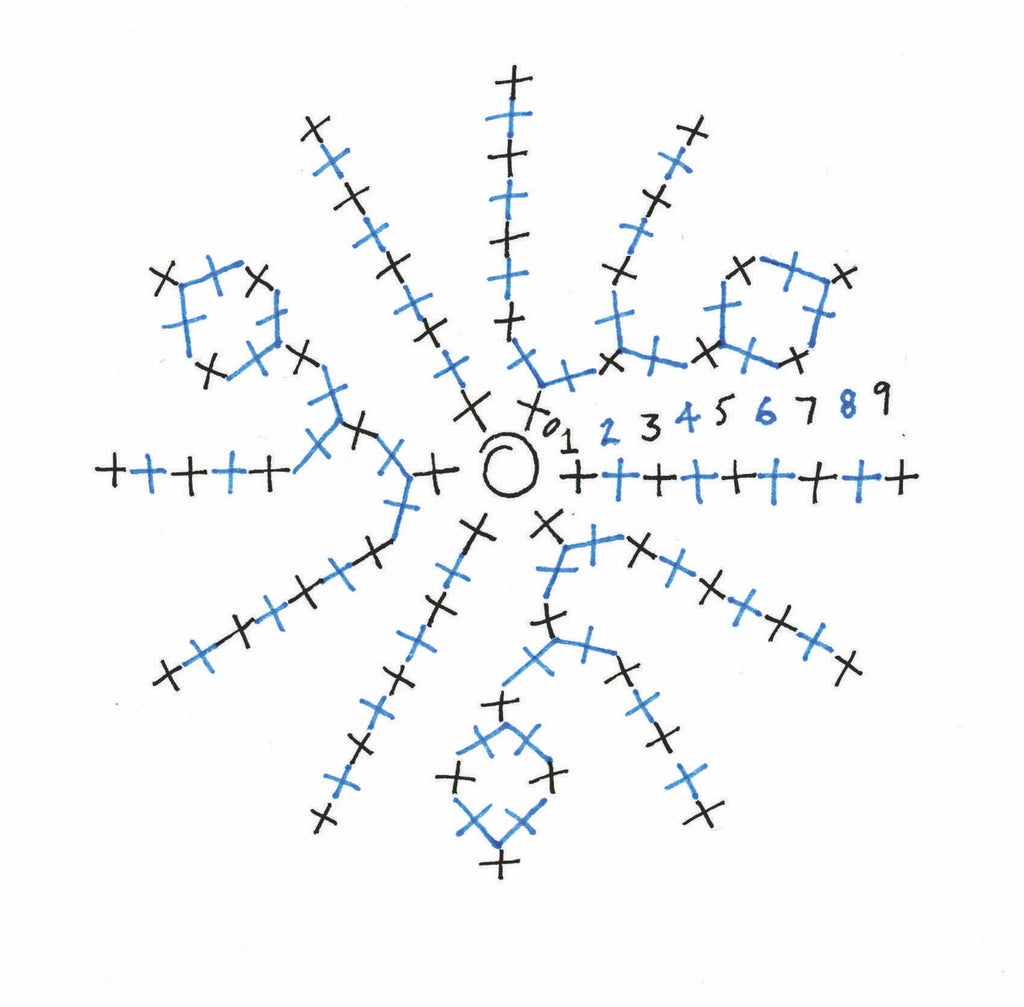
Each crochet diagram is available to view on screen or download and print.

Crochet abbreviations:
- ch - chain
- cm - centimetre(s)
- dc - double crochet
- dc2tog - work 2 double crochet stitches together to decrease
- dc2inc - work 2 double crochet stitches into the next stitch to increase
- dc3inc - work 3 double crochet stitches into the next stitch to increase
- dec - decrease
- htr - half treble
- htr2inc - work 2 half treble stitches into the next st to increase
- htr3inc - work 3 half treble stitches into the next st to increase
- in - inch(es)
- inc - increase
- m - metre(s)
- mm - millimetre(s)
- rep - repeat
- RS - right side
- sl st - slip stitch
- sp - space
- st(s) - stich(es)
- tog - together
- tr - treble
- tr2inc - work 2 treble stitches into the next st to increase
- 3 trcl - work 3 treble stitches together in next stitch to form a cluster
- WS - wrong side
- yd - yard(s)
- yrh - yarn round hook
Stage one: The Robin's Head
Round 1: 1 ch, 5 dc into loop (5 sts).
Round 2 (inc): (Dc2inc) 5 times (10 sts). Pull tight on short end of yarn to close loop.
Round 3 (inc): (Dc2inc, 1 dc) 5 times (15 sts).
Round 4: 1 dc in each dc. Join B to last dc. Carry unused yarn across the WS of the work.
Round 5 (inc): 1 dc in next 8 dc with B; with A, work 1 dc in next dc, (dc2inc) 5 times, join C to last dc, with C work 1 dc in next dc (20 sts).
Round 6: 1 dc in next 8 dc with B, 1 dc in next dc with C; with A, work 1 dc in next 10 dc, 1 dc in next dc with C.
Round 7 (inc): 1 dc in next dc with C, 1 dc in next 8 dc with B, 1 dc in next 2 dc with C, (dc2inc, 1 dc) 4 times with A, 1 dc in next dc with C (24 sts).
Round 8: 1 dc in next dc in C, 1 dc in next 8 dc with B, 1 dc in next 2 dc with C, 1 dc in next 12 dc with A, 1 dc in next dc with C.
Round 9 (inc): 1 dc in next 2 dc with C, 1 dc in next 3 dc with B, (dc2inc) twice, 1 dc in next 3 dc, 1 dc in next 3 dc with C, (dc2inc, 2 dc) 3 times with A, dc2inc, 1 dc in next dc with C (30 sts).


Stage 2: The Robin's Breast
Starting at the top of the head, with 2.25mm hook and A, make a magic loop (an adjustable loop of yarn). To make the loop, wind the yarn around a finger, insert the hook, catch the yarn and draw back through the loop. After a couple of rounds have been crochetted, covering the loop of yarn, the short end of yarn is pulled tight to close the centre.

The following is worked in rows.
Row 1 (RS): 1 dc in next 2 dc with C, 1 dc in next 7 dc with B, sl st in next dc, turn.
Row 2 (WS): With B, work 1 dc in same dc as sl st, 1 dc in next 5 dc, sl st in next dc, turn.
Row 3 (inc): 1 dc in same dc as sl st, 1 dc in next 2 dc, (dc2inc) twice, 1 dc in next 3 dc, sl st in next dc, turn (32 sts).
Row 4: 1 dc in same dc as sl st, 1 dc in next 11 dc, sl st in next dc with C, turn.
Row 5 (inc): 1 dc in same dc as sl st, 1 dc in next 5 dc with B, (dc2inc) twice, 1 dc in next 5 dc, 1 dc in next dc with C, sl st in next dc, turn (34 sts).
Row 6: 1 dc in same dc as sl st, 1 dc in next dc, 1 dc in next 14 dc with B, 1 dc in next 2 dc with C, sl st in next dc, turn.
Row 7 (inc): 1 dc in same dc as sl st, 1 dc in next 2 dc, 1 dc in next 7 dc with B, join D to last dc, 1 dc in same dc with D, (1 dc with D, 1 dc with B) in next dc, 1 dc in next 6 dc with B, 1 dc in next 3 dc with C, sl st in next dc with A, turn (36 sts).
Row 8: 1 dc in same dc as sl st, 1 dc in next 3 dc with C, 1 dc in next 6 dc with B, 1 dc in next 4 dc with D, 1 dc in next 6 dc with B, 1 dc in next 3 dc with C, 1 dc in next dc with A, sl st in next dc, turn.
Row 9 (inc): 1 dc in same dc as sl st, 1 dc in next dc, 1 dc in next 3 dc with C, 1 dc in next 6 dc with B, 1 dc in next dc with D, (dc2inc) twice, 1 dc in next dc, 1 dc in next 6 dc with B, 1 dc in next 3 dc with C, 1 dc in next 2 dc with A, sl st in next dc, turn (38 sts).
Row 10: 1 dc in same dc as sl st, 1 dc in next 2 dc, 1 dc in next 4 dc with C, 1 dc in next 5 dc with B, 1 dc in next 6 dc with D, 1 dc in next 5 dc with B, 1 dc in next 4 dc with C, 1 dc in next 3 dc with A, sl st in next dc, turn.
Row 11 (inc): 1 dc in same dc as sl st, 1 dc in next 3 dc, 1 dc in next 5 dc with C, 1 dc in next 3 dc with B, 1 dc in next 3 dc with D, (dc2inc) twice, 1 dc in next 3 dc, 1 dc in next 3 dc with B, 1 dc in next 5 dc with C, 1 dc in next 4 dc with A, sl st in next dc, turn (40 sts).
Row 12: 1 dc in same dc as sl st, 1 dc in next 4 dc, 1 dc in next 26 dc with D, 1 dc in next 5 dc with A, sl st in next dc, turn.
Row 13 (inc): 1 dc in same dc as sl st, 1 dc in next 5 dc, 1 dc in next 12 dc with D, (dc2inc) twice, 1 dc in next 12 dc with D, 1 dc in next 8 dc with A, do not turn (42 sts).

Stage 3: Shape middle of body

Row 1 (RS): 1 dc in next 6 dc, turn.
Row 2 (WS): 1 ch, 1 dc in next 14 dc with A, 1 dc in next 28 dc with D, sl st in first dc, turn.
Row 3 (dec): (Dc2tog, 5 dc) 4 times with D, (dc2tog, 5 dc) twice with A, turn (36 sts).
Row 4: 1 ch, 1 dc in next 12 dc with A, 1 dc in next 24 dc with D, sl st in first dc, turn.
Row 5 (dec): (Dc2tog, 4 dc) 4 times with D, (dc2tog, 4 dc) twice with A, turn (30 sts).
Row 6: 1 ch, 1 dc in next 10 dc with A, 1 dc in next 20 dc with D, sl st in first dc, turn.
Row 7 (dec): (Dc2tog, 3 dc) 4 times with D, (dc2tog, 3 dc) twice with A, turn (24 sts).
Row 8: 1 ch, 1 dc in next 8 dc with A, 1 dc in next 16 dc with D, sl st in first dc, turn.
Stage 4: Leg Opening
The following is worked in rounds. Carry unused yarn across the WS of the work.
Round 1: 1 dc in next 2 dc with D, 12 ch, skip next 12 dc, 1 dc in next 2 dc, 1 dc in next 8 dc with A.
Round 2: 1 dc in next 2 dc with D, 1 dc in next 12 ch, 1 dc in next 2 dc, 1 dc in next 8 dc with A.
Round 3 (dec): (Dc2tog, 2 dc) 4 times with D, (dc2tog, 2 dc) twice with A (18 sts).
Round 4 (dec): (Dc2tog, 1 dc) 4 times with D, (dc2tog, 1 dc) twice with A (12 sts).
Round 5: 1 dc in next 8 dc with D, 1 dc in next 4 dc with A.
Break yarn and thread through the last round, pull up tight to close the opening and fasten off.

Stage 5: The tail
With 2.25mm hook and A, make 15 ch.
Row 1 (WS): 1 dc in 2nd chain from hook, 1 dc in next 4 ch, 1 htr in next 8 ch, 5 htr in end ch, working in the reverse side of the ch, 1 htr in next 8 ch, 1 dc in next 5 ch, turn (31 sts).
Work the next row around the craft wire so they retain their shape.
Row 2 (RS): 1 ch, 1 dc in the first 13 sts, (dc2inc) 5 times, 1 dc in next 13 sts, 1 ch, work 4 dc evenly across the lower edge of the tail, sl st in first dc (40 sts).
Fasten off, leaving a long tail of yarn at the end.

Stage 6: The wings
In this section, you'll need to make two wings for the robin.
With 2.25mm hook and A, make a magic loop.
Row 1: 1 ch, 6 dc into loop, turn (6 sts).
Row 2: 1 ch, 1 dc in each dc, turn. Pull tight on short end of yarn to close loop.
Row 3 (inc): 1 ch, (dc2inc, 1 dc) 3 times, turn (9 sts).
Row 4: 1 ch, 1 dc in each dc, turn.
Row 5: 1 ch, 1 dc in next 3 dc, sl st in next dc, turn.
Row 6 (inc): 1 dc in same dc as sl st, 1 dc in next dc, 1 htr in next dc, tr2inc, turn (10 sts).
Row 7: 1 ch, 1 dc in next 5 sts, sl st in next dc, turn.
Row 8 (inc): 1 dc in same dc as sl st, 1 dc in next 2 dc, 1 htr in next dc, htr2inc, tr2inc, turn (12 sts).
Row 9 (inc): 1 ch, dc2inc, 1 dc in next 7 sts, sl st in next dc, turn (13 sts).
Row 10 (inc): 1 dc in same dc as sl st, 1 dc in next 5 dc, 1 htr in next dc, htr2inc, 1 tr in next dc, tr2inc, turn (15 sts).
Row 11 (inc): 1 ch, dc2inc, 1 dc in next 11 sts, sl st in next dc, turn (16 sts).
Row 12 (inc): 1 dc in same dc as sl st, 1 dc in next 9 dc, 1 htr in next dc, htr2inc, 1 tr in next st, tr2inc, turn (18 sts).
Row 13 (inc): 1 ch, dc2inc, 1 dc in next 15 sts, sl st in next dc, turn (19 sts).
Row 14 (inc): 1 dc in same dc as sl st, 1 dc in next 16 dc, dc2inc, turn (20 sts).
Row 15: 1 ch, 1 dc in next 19 sts, sl st in next dc.
Fasten off, leaving a long tail of yarn at the end.


Stage 7: The beak
With 1.25mm hook and A, make 4 ch. Work row 1 around the craft wire.
Row 1: 1 dc in 2nd chain from hook, 1 dc in next dc, 3 dc in end ch, working in the reverse side of the ch, 1 dc in next 2 ch, turn (7 sts).
Row 2: 1 ch, 1 dc in next dc, sl st in next 3 dc.
Fasten off, leaving a long tail of yarn.

Stage 8: The eggs
With 1.75mm hook and D, make a magic loop.
Round 1: 1 ch, 6 dc into loop (6 sts).
Round 2 (inc): (Dc2inc, 1 dc) 3 times (9 sts). Pull tight on short end of yarn to close loop.
Round 3: 1 dc in each dc.
Round 4 (inc): (Dc2inc, 2 dc) 3 times (12 sts).
Round 5: 1 dc in each dc.
Round 6 (inc): (Dc2inc, 3 dc) 3 times (15 sts).
Round 7: 1 dc in each dc.
Round 8 (dec): (Dc2tog, 3 dc) 3 times (12 sts).
Round 9: 1 dc in each dc.
Break yarn and thread through rem sts. Stuff egg, pull end of yarn tight to close the opening and fasten off. Repeat the process to make 5-6 eggs.
Embroider speckles on the egg using yarn B. Work a scattering of tiny single stitches that are denser towards the larger end of the egg.

Stage 9: Make the legs
The birds’ legs are made using wire that is bent into shape and wrapped in yarn. Make sure the wire is not too soft, as it could snap if overworked and may buckle under the weight of the bird.
Start by making a bend in the wire 3⁄8in (1cm) from each end with long-nose pliers. Make three toes by bending the wire back on itself every 5⁄8in (1.5cm). Squeeze together with the pliers. Make a fourth toe the same length at the back of the foot.

Wrap the short length left at each end of the birds’ legs around the ankle to keep the wire toes in position and squeeze the wire end with the pliers. Use the pliers to squeeze the two sharp ends around the top of the wire legs where they will be hidden inside the body, securing them in place. Twist the bird’s feet so they both face the same direction.

Bend the length of wire between the feet into a curved shape to fit inside the body of the bird. Bend the tips of the toes downwards to shape the feet and bend the legs into position.

Starting at the ankle, wind the yarn around the wire. Bring the yarn to the end of each toe and then wind it evenly and tightly back along the length to the ankle. Wrap the yarn over the curved legs and around the toes of the other foot in the same way. Secure the end of the yarn with a dab of all-purpose adhesive and allow to dry.

Stage 10: Stuffing and attaching the legs
Stuff the body firmly, leaving a gap at the opening to insert the legs.
Slip the legs into the opening at the base of the bird and adjust them so the bird stands without tipping over. Add plenty of extra stuffing inside the body until it is firm. Sew together the opening of the body around the legs, adding extra stuffing if necessary.

Stage 11: The eyes
As these birds are decorative and unsuitable for children, glass teddy bear eyes with wire loops can be sewn onto your finished project. If preferred, you can also use buttons made for dolls’ clothes, or beads.
Start by marking the position of both eyes on the bird’s head with glass-headed pins. If using glass eyes with wire loops, use a yarn needle to make a hole at the markers. This will make it easier to insert the wire loop when attaching the eyes.
N.B. Use strong sewing thread to sew on glass eyes, such as upholstery or buttonhole thread, matching the colour of the bird’s head. Check the thread you are going to use does not break easily. Beeswax can be used to strengthen all-purpose sewing thread. Draw the thread across the beeswax a few times to coat it.
Cut a length of strong sewing thread, such as upholstery or buttonhole thread. It should be four times the total measurement of the depth of the head, from front to back, plus approximately 4–6in (10–15cm) extra. Double the thread and pass both loose ends through the wire loop of the glass eye. If using all-purpose sewing thread coated with beeswax, cut the length eight times the total measurement, and double it twice before using it to attach the eyes, as it is finer than the strong sewing thread.

Thread both the ends of thread onto the yarn needle and insert the needle at the point of the marker, right through to the back of the head. Leave the ends of the thread hanging at the back of the head. Attach the second eye in the same way, pulling the threads through to the back of the head, close to the threads of the first eye.

Remove the needle and pull tight on the threads of both eyes. Check the position of the eyes and tie the threads together, knotting them securely. Thread all the strands onto the needle and pull them through to the inside of the bird to hide the ends. Trim the excess ends that poke out of the bird.
Stage 12: Attaching the wings and beak
Use the tail of yarn left after fastening off at the tip of the beak to sew the edges of the beak together and stitch it to the head. Thread the ends of the wire through to the inside of the bird.
For the wings, flip one wing so the wings mirror each other and position them on the bird with the last row at the lower edge of each wing. Use the tail of yarn left after fastening off to sew the top, curved edge of each wing to the body.
Your finished crocheted robin
Congratulations! Your crochet robin is now complete. Place it on your mantle along with some holy or your Christmas tree for a festive flair.
Now that you've mastered this crocheted bird, why not another skill? This embroidery set comes with everything you need to create a gorgeous art deco festive goldwork embroidery. Available soon, register your interest to get notified.